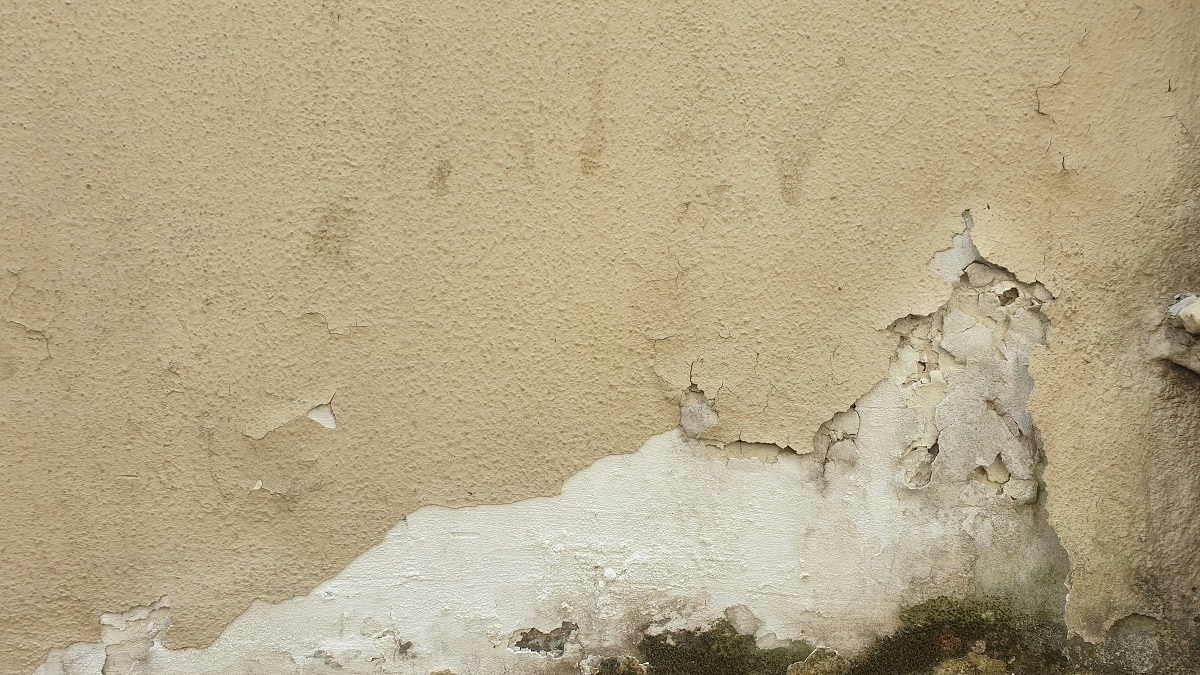
Signs of Water Damage in Walls: Protecting Your Peaceful Home
Key Takeaways
- Discoloration, bubbling paint, and warped drywall are often the earliest visual clues that moisture is hiding behind a wall surface
- A musty smell without a visible source usually points to hidden moisture or mold colonies developing inside wall cavities
- Mold can begin growing within one to two days after a leak, making fast action critical for both health and structural reasons
- Simple tools like a moisture meter, flashlight, and infrared thermometer can help homeowners confirm suspicions before calling a professional
- Common culprits include leaking pipes, roof failures, poor exterior sealing, and condensation from humidity imbalances
- Addressing the moisture source first, then drying and repairing the wall, prevents the problem from returning
- Routine inspections of plumbing, roofing, and caulking save thousands in long-term repair costs
There’s a specific kind of quiet unease that creeps in when you notice something slightly off about a wall in your house. Maybe the paint looks a little puffy near the baseboard. Maybe there’s a faint smell you can’t quite trace. These small details often get brushed aside, but they can be the first whisper of a much bigger problem brewing behind your drywall.
Moisture is sneaky. It travels along studs, pools inside cavities, and feeds mold spores long before anything dramatic appears on the surface. By the time a wall is visibly stained or sagging, the issue has usually been developing for weeks or months. The good news is that catching it early is entirely possible if you know what to look for and how to respond.
This guide walks you through a clear, step-by-step process. You’ll learn how to spot trouble, confirm what you’re seeing, trace the source, and take practical action to protect your home before small issues become expensive ones.
Why Hidden Moisture Deserves Your Attention
Water intrusion is one of the most common and costly problems homeowners face. According to the Insurance Information Institute, roughly 22.6% of home insurance claims between 2019 and 2023 involved water or freezing issues, making it the second biggest category after wind and hail. That’s not a small slice. That’s nearly one in four claims.
The reason moisture is so destructive is that it rarely stays in one place. Water follows gravity, wicks into porous materials, and keeps traveling until something stops it. A tiny pinhole leak behind a bathroom wall can swell flooring in an adjacent hallway two weeks later. The symptoms often appear far from the actual source.
The hidden cost of waiting
Delaying repairs almost always makes the problem worse. Wet drywall loses structural integrity. Wet insulation stops insulating. Wet wood framing becomes food for mold, carpenter ants, and termites. What might have been a $300 patch job can balloon into a multi-thousand-dollar renovation if you wait too long to act.
Visual Clues You Should Never Ignore
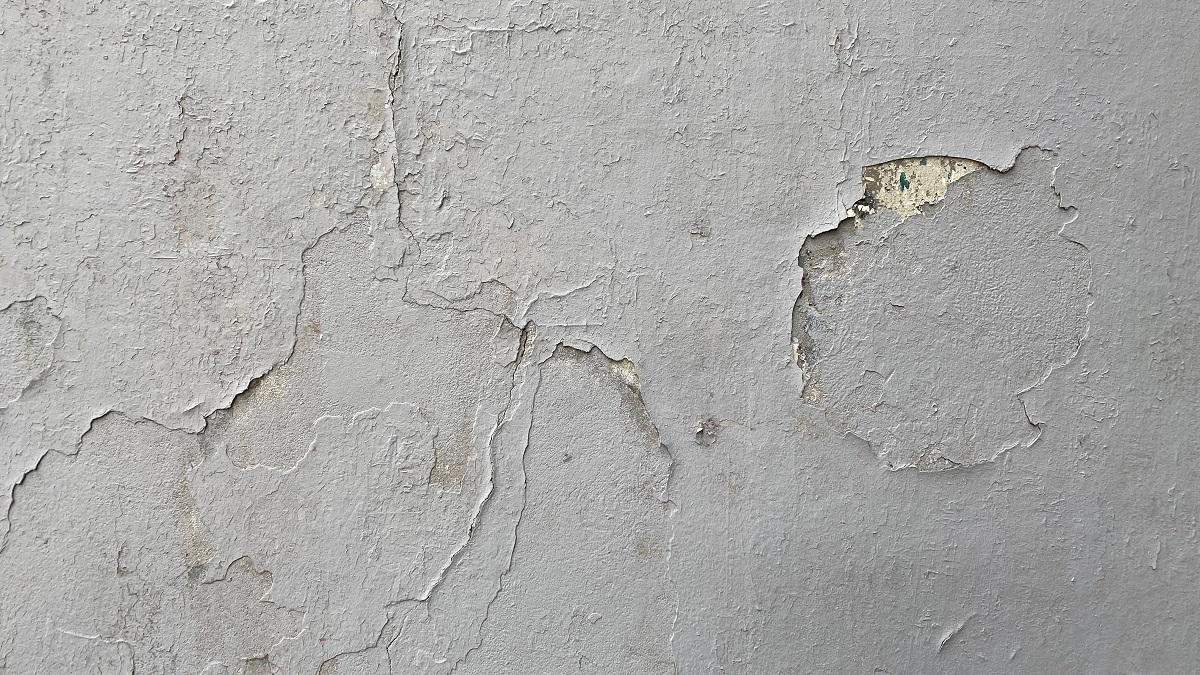
Your eyes are the first and best tool you have for catching problems before they turn into expensive repairs. Walk through each room of your home slowly, especially spaces adjacent to bathrooms, kitchens, laundry rooms, and exterior walls. Pay extra attention to the areas beneath windows, around door frames, behind large pieces of furniture, and in corners where two exterior walls meet. Look at the walls from different angles because some issues only reveal themselves in raking light from a window or lamp. A flashlight held parallel to the wall surface is a surprisingly effective trick — it exaggerates even small bumps, ripples, or dips in the drywall that are nearly invisible in ambient lighting.
Common signs of water damage in walls include subtle shifts in color, texture, and shape that are easy to miss if you aren’t paying attention. In many cases, the earliest indicators look like minor cosmetic flaws you might blame on an old paint job or settling, when they’re really the first whispers of broader home damage happening behind the surface. The most reliable visual indicators include:
- Yellow, brown, or copper-tinged stains that spread outward in irregular shapes, often with darker rings around the edges where mineral deposits have accumulated
- Paint that bubbles, cracks, or peels away from the surface in sheets, sometimes revealing a chalky or discolored layer underneath
- Drywall that looks warped, bowed, or soft when you press on it, especially around electrical outlets, baseboards, or ceiling seams
- Dark spots or fuzzy growth in black, green, gray, or white that could indicate mold colonization behind or on the wall surface
- Visible salt-like deposits called efflorescence, especially on basement and foundation walls, which signal that moisture has moved through the masonry and evaporated on the surface
- Baseboards or trim pulling away from the wall as wood swells and shifts, with visible gaps appearing where caulk lines used to sit flush
- Wallpaper that lifts at the seams, develops bubbles, or shows faint tide-line patterns following the path of moisture movement
- Nail or screw heads that suddenly become visible as small round pops in the drywall, pushed out as the material behind them expands
If you spot any of these, photograph them with your phone and include something for scale, like a coin or ruler, in the frame. Date the photos and take follow-up shots from the same angle every few days. This gives you a baseline so you can tell whether the problem is spreading, deepening in color, or changing shape over the following days — information that will be invaluable to a contractor, inspector, or insurance adjuster later on.
How to Confirm What Your Senses Are Telling You
Not every stain means disaster, and not every musty whiff means mold. Before you tear into a wall, confirm your suspicions with a few straightforward checks. A little verification saves a lot of unnecessary demolition.
Start with your nose. Mustiness that lingers in one specific area, even after cleaning, strongly suggests trapped moisture. According to AXION Mold & Water Damage Restoration, mold can take hold within just 24 to 48 hours once a surface stays wet, so a persistent odor should never be ignored.
Next, grab a few basic tools. You don’t need professional gear to get useful information.
- A pin-style moisture meter to measure water content inside drywall
- An infrared thermometer to detect cold spots that often indicate wet areas
- A bright flashlight angled parallel to the wall to reveal bulges and warping
- A simple screwdriver to gently probe suspicious soft spots
- A small mirror and phone camera to peek behind furniture and appliances
Reading moisture meter results
Dry drywall typically reads below 1% on a pin meter, while anything above 1.5% suggests active moisture. Readings jumping around as you move across a wall help you map the wet zone and often point back toward the source. Mark the wet perimeter with painter’s tape so you can track whether it grows or shrinks over a few days.
What’s Actually Causing the Problem?

Finding moisture is only half the job. If you patch the wall without fixing the source, you’ll be doing the same repair again next year, and probably paying more for it the second time around because the hidden rot will have spread further into framing, insulation, and subfloor. Water damage inside walls generally traces back to a handful of usual suspects, and knowing them helps you investigate efficiently instead of guessing and tearing out drywall at random.
Plumbing is the most common culprit. Supply lines, drain pipes, shower pans, tub overflows, ice-maker lines, dishwasher hoses, and washing machine supply valves all run through walls or against them, and any one of them can fail quietly for a long time before you see evidence on the surface. A pinhole leak in a copper supply line can release just a few drops an hour — enough to soak insulation and feed mold colonies for months without ever producing a visible drip. The Insurance Information Institute reports that about 1 in 60 insured homes files a water-related claim annually, and plumbing failures account for a sizeable share of those incidents. Older homes with galvanized steel pipes, polybutylene, or early-generation PEX fittings are especially vulnerable, as are any homes where previous repairs were done quickly rather than correctly.
Exterior issues are the second major category, and they’re often the hardest to trace because the entry point can be several feet — or even an entire story — away from where you first spot the damage. Think about:
- Roof leaks that travel down inside wall cavities before showing up as stains on a lower floor
- Failed caulking around windows, doors, and exterior trim that lets rainwater wick behind the siding
- Clogged gutters that overflow and soak siding or foundation walls during every storm
- Cracks in stucco, brick, or siding that let wind-driven rain seep inside, especially on walls facing prevailing weather
- Failed flashing around chimneys, skylights, or vent pipes where two different materials meet
- Deck ledger boards and attached porches that were never properly flashed to the house
- Grading problems that direct runoff toward the foundation instead of away from it
Each of these can create slow, intermittent intrusions that only show up during certain weather conditions, which is why many homeowners miss the pattern until the home damage becomes severe.
Condensation is the sneaky third category. When warm, humid indoor air meets a cold surface inside a wall, moisture collects on framing and insulation, often without ever producing a drip you could track. This happens most often in poorly insulated exterior walls, around uninsulated ductwork running through unconditioned spaces, behind furniture pushed tight against cold north-facing walls, and in homes where humidity levels climb above 60% during cold months. Bathrooms without working exhaust fans, kitchens with heavy stovetop cooking, and basements with unsealed concrete floors all pump extra moisture into the air that eventually has to go somewhere — and that somewhere is often the inside of your wall assemblies.
Narrowing down the source
Trace the wet area upward and outward from the highest point of moisture. Water almost always enters high and travels down, so the top edge of your damp zone is usually closer to the actual entry point than the bottom. Check the room above, the attic space directly over the stain, and any plumbing fixtures on the other side of the wall — a shower backing up to the suspect area is a prime candidate, as is any toilet flange on the floor above. Run the water in nearby fixtures one at a time for several minutes each while you watch the wall, and pay attention to whether the moisture appears only during rain, only after showers, or constantly regardless of weather. That timing alone will tell you whether you’re chasing plumbing, exterior intrusion, or condensation, and it saves you from recognizing the same signs of water damage in walls six months after a cosmetic patch.
Taking Action Before Things Get Worse
Once you’ve confirmed moisture and identified a likely source, the next steps matter more than most people realize. Rushing to repaint without drying the cavity traps water inside, where it continues feeding mold and rotting framing. Doing nothing is even worse.
Start by stopping the water. Shut off the relevant supply valve, tarp the roof section, or redirect the gutter downspout. Whatever is feeding the wall needs to stop before anything else happens. Then open the wall if the damage is significant. Cutting a small inspection window in the drywall lets air circulate and gives you a direct look at the framing and insulation behind it.
Dry the cavity thoroughly using fans and a dehumidifier running continuously for several days. Wet insulation almost always needs to be removed and replaced because it can’t be effectively dried in place. Treat any visible mold on framing with an appropriate cleaner, and let everything reach a stable low moisture reading before closing the wall back up. For a broader walkthrough on handling household issues like these, this guide to repairing home damage offers a useful framework for prioritizing repairs without getting overwhelmed.
When to call a professional
Some situations really do require expert help. Call a licensed contractor or water restoration specialist if:
- The affected area is larger than about ten square feet
- You see or smell mold that keeps returning after cleaning
- Framing or structural elements feel soft, spongy, or crumbly
- The source involves sewage, groundwater, or anything contaminated
- You’re not confident about electrical safety near the damp area
Professionals bring industrial drying equipment, antimicrobial treatments, and the experience to spot problems you might miss. For widespread home damage involving multiple rooms or long-standing leaks, their assessment is almost always worth the cost.
Preventing the Next Leak Before It Starts
The best repair is the one you never have to make. A few simple habits dramatically reduce the chance of moisture problems taking hold inside your walls, and most of them take less than an hour a season.
- Walk your home’s exterior every spring and fall, looking for cracked caulk, loose siding, and failing flashing
- Clean gutters at least twice a year and after major storms
- Check under every sink monthly for drips, corrosion, or warped cabinet bottoms
- Replace washing machine hoses every five years, or sooner if they look brittle
- Keep indoor humidity between 30% and 50% using a hygrometer to monitor levels
- Inspect your roof from the ground with binoculars after heavy weather
- Service your water heater annually and watch for rust at the base
Small, consistent attention beats dramatic emergency repairs every time. A ten-minute walkthrough can surface problems while they’re still cheap and simple to fix.
Final Thoughts
Walls are supposed to be the quiet, dependable backdrop of your home, not a source of anxiety. When you learn to read the subtle cues they offer, you stop being surprised by hidden problems and start catching them while they’re still manageable. A stain here, a soft spot there, a lingering smell in one corner of a room, these are the kinds of details that reward attention.
The homeowners who avoid major moisture disasters aren’t lucky. They’re observant. They notice changes early, confirm them with simple tools, and respond before small issues have a chance to grow. That same approach works whether you’ve lived in your house for thirty years or just signed the papers last month.
Your home is one of the biggest investments you’ll ever make, and protecting it doesn’t require special training. It just requires paying attention, acting promptly, and trusting that the quiet signs are worth taking seriously. The peace of mind that comes from knowing your walls are sound is worth every minute spent checking on them.


